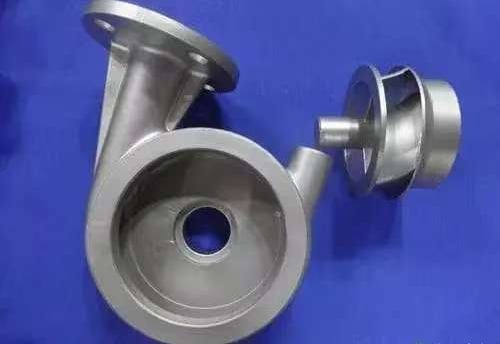
Analysis of Casting Deformation Problems and Process Optimization Plan
Blog post description.
6/26/20253 min read


I. Definition and Manifestations of Casting Deformation
Casting deformation refers to the phenomenon where metal components deviate from their intended geometric shape as specified in the drawings due to thermal stress, mechanical stress, or structural design flaws during the casting process. Specific manifestations include:
Dimensional Deviation: Critical dimensions exceeding tolerance limits.
Contour Distortion: Bending, warping, or twisting in asymmetric structures.
Local Shrinkage: Depressions or bulges in thin-walled areas.
This defect category is consistently ranked among the most common and economically impactful in investment casting. (According to Japan's Precision Casting Technology Handbook, deformation accounts for 32%-45% of defects).
II. Full-Process Cause Analysis of Deformation
Casting deformation is not an isolated process issue but the result of cumulative stress throughout the investment casting workflow. Systematic investigation must cover these key stages:
Wax Pattern Production Stage
Mold Release Defects: Excessive mold opening resistance causing internal stress concentration in wax pattern assemblies.
Uneven Cooling Rate: Failure to promptly immerse wax patterns in a chilled water tank (<10°C recommended) after removal, leading to localized shrinkage variations.
Assembly Risks:
Improper gating design: Large gates not produced separately or lacking hollow gate design.
Absence of anti-deformation structures: Omission of Reverse Deformation Ribs or anti-deformation fixtures.
Shell Building Stage
Coating Application Errors:
Pattern clusters colliding with tank walls (<10cm clearance).
Failure to control curing gradients between layers (Recommended: Face coat 22-24°C / 60-65% RH, Backup coats 22-26°C / 30-40% RH).
Shell Structural Design Defects:
Large flat surfaces lacking reinforcement ribs (Recommend V-ribs every 300mm²).
Non-uniform shell thickness (Recommended: Face coat 1.5-2.5mm, Backup coats 3-5mm).
Melting & Pouring Stage
Firing Process Failure:
Stacked shells during firing causing localized pressure deformation (Single-layer placement + bottom air supply recommended).
Non-compliant soaking curves (1050°C for 90 minutes recommended).
Gating System Design Flaws:
Ingate location intersecting stress-sensitive zones.
Excessive pouring temperature gradient (Recommended: Tap temp > Pouring temp by 80-100°C).
Post-Casting Process Risks
Handling & Transport:
Lack of dedicated anti-shock pallets during inter-process transfers.
Stacking during heat treatment causing gravity deformation (Single-layer suspension + graphite supports recommended).
Gate Removal:
Use of non-thermal methods (e.g., plasma or laser cutting absent) leading to Heat Affected Zone (HAZ) deformation.
III. Systematic Solutions & Process Optimization
Core Principle: Achieve controllable deformation through full-process stress balance design (Target: Deformation <30% of drawing tolerance).
Wax Pattern Stage Anti-Deformation Strategies
Standardized Demolding:
Use high-pressure air (0.5-0.7 MPa) for assisted demolding.
Immediate immersion in chilled water tank (<10°C) post-demolding.
Anti-Deformation Structural Design:
Add Reverse Deformation Ribs (0.1-0.3mm preset reverse curvature) to symmetric thin-walled parts.
Adopt independent casting + post-welding for large gates.
Shell Building Critical Controls
Coating Operation Standards:
Maintain ≥15cm clearance between clusters/equipment; allow 30 min settling before next coat.
Monitor colloidal silica aging with pH meter (Stable pH 2.5-3.5 recommended).
Structural Optimization:
Add V-ribs (60°-75° recommended) to large flat areas.
Grade backup stucco grain size (16-30 mesh molochite ideal).
Melting & Pouring Process Upgrades
Optimized Firing Curve:
Single-layer placement + bottom air supply ensuring <5°C/layer temperature difference.
Implement IR thermometers for real-time firing uniformity monitoring.
Gating System Design Rules:
Position ingates away from stress concentration zones (≥3x wall thickness from thin sections).
Employ stepped pouring (Pouring speed controlled at 5-8mm/s).
Post-Casting Anti-Deformation Measures
Handling & Transport Standards:
Use customized anti-shock pallets (≥5mm cushion material).
Utilize graphite suspension racks (≤200mm spacing) during heat treatment.
Correction Process Supplement:
Apply hydraulic straightening presses (30-50 MPa pressure) for parts with deformation >0.5mm.
Implement secondary aging treatment (200°C × 2 hours) post-correction.
IV. Quality Control Closed-Loop Management
Data Monitoring: Establish real-time databases for shell thickness, firing temp, pouring speed, etc.
First-Article Inspection: Perform CMM measurement (±0.1mm tolerance) on the first piece per batch.
Deformation Prediction Model: Utilize FEA simulation (e.g., ANSYS) to predict stress distribution and optimize process parameters.
V. Conclusion
Casting deformation presents a systemic challenge in investment casting, requiring control measures spanning from wax pattern design to heat treatment. Through the triple safeguard of standardized process parameters, optimized structural design, and a digital monitoring system, the deformation defect rate can be reduced below 5%, significantly enhancing product yield and customer satisfaction. For highly complex parts, implementing Pre-deformation Compensation design is recommended as the ultimate quality assurance measure.